
Is your back feeling a little stressed lately? I know sitting at a desk all day or driving long distances can really do a number on your spine. Even just daily life stuff can cause tension to build up back there. That’s why I’m sharing this dope routine I found for stretching out your back – it’s perfect for beginners like us!
No equipment is needed, you can do it from the comfort of your own home. The stretches are super gentle and aim to decompress problem areas. Just 12 moves that’ll have your back feeling so much better. Trust me, nothing feels better than a good deep stretch when things are feeling tight.
1. Supine position
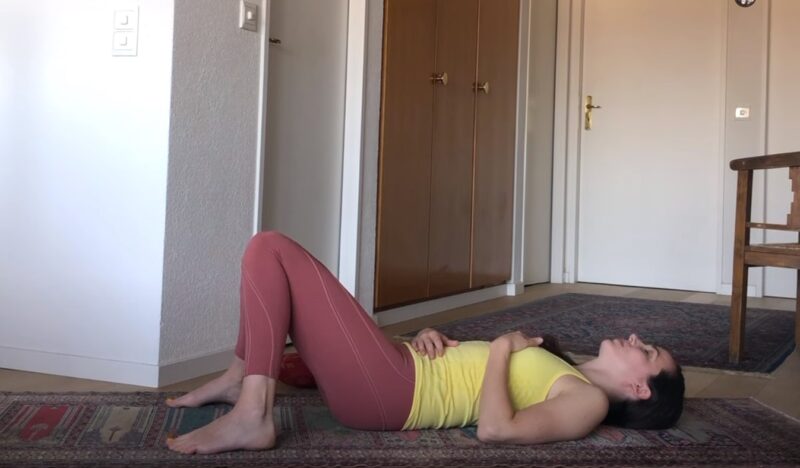
Lying flat on your back, you engage in the supine position, a fundamental starting point for spinal decompression. This stance serves as a critical foundation, preparing the body for subsequent stretches.
Its simplicity belies its effectiveness, offering you a moment to center yourself, focus on your breathing, and begin the process of releasing tension from the spine. By starting in a supine position, you actively engage in mindfulness, becoming acutely aware of each part of the spine and its connection to the floor.
This awareness is critical for identifying areas of tension and misalignment that other exercises will address. The supine position also serves as a diagnostic tool. As you lie back, you may notice subtle imbalances or areas of discomfort, guiding focus to specific regions during your exercise regimen.
Moreover, this initial posture allows for a gentle introduction to deeper stretches, ensuring that the body is adequately prepared and minimizing the risk of injury.
Pay close attention to your breath, allowing each inhale to fill your lungs and each exhale to release tension. Visualize your spine elongating and aligning, creating space between each vertebra. This visualization promotes a deeper connection to the exercise, enhancing both its physical and mental benefits.Instructions
- Select a flat, comfortable area to lie down.
- Position yourself on your back, ensuring your spine, head, and neck align naturally with the surface.
- Extend your legs, allowing a slight bend in the knees if necessary to reduce lower back strain.
- Place your arms by your sides, palms facing up, to open the chest and shoulders.
- Breathe deeply and evenly, focusing on the rise and fall of your abdomen.
- Remain in this position for several minutes, using the time to mentally scan your body for areas of tension or discomfort.
2. Heel slides
Heel slides are a gentle exercise that activates your lower back and core, stretching the muscles while maintaining a safe, grounded position. These serve as an introduction to the movement, perfect for those new to spinal exercises. They help build core strength in a way that minimizes risk, making them an essential part of a beginner’s routine for spinal health.
As you slide your heel, visualize the muscles in your lower back and abdomen engaging and stretching. It’s a simple movement, yet it brings profound effects, offering a gentle stretch and strengthening your core muscles simultaneously.How to do it
- Lie on your back on a flat surface, arms by your sides, and both legs extended.
- Bend one knee and slide the heel towards your pelvis, keeping the movement smooth.
- Extend the leg back to the starting position and repeat with the other leg.
- Perform this movement slowly, focusing on the engagement of your abdominal and lower back muscles.
- Alternate legs for several repetitions, maintaining a slow, controlled pace.
3. Cat-cow
Cat-cow is an exercise that transitions your spine through flexion and extension, promoting flexibility and circulation in the vertebral column. This movement enhances mobility and encourages a healthy curvature of your spine. It’s beneficial for loosening tight back muscles and is a cornerstone exercise for spinal health.
Embrace the flow between poses, imagining your spine as a wave smoothly transitioning from peak to trough.Instructions
- Begin on your hands and knees, ensuring proper alignment with your knees under your hips and wrists under your shoulders.
- Inhale as you arch your back downwards, lifting your head and tailbone towards the ceiling (Cow pose).
- Exhale as you round your spine upwards, tucking your chin to your chest (Cat pose).
- Flow smoothly between these two positions, focusing on the movement of your spine and the deepening of your breath.
- Repeat for several cycles, allowing the movement to help release any tension in your back.
4. Child’s Pose
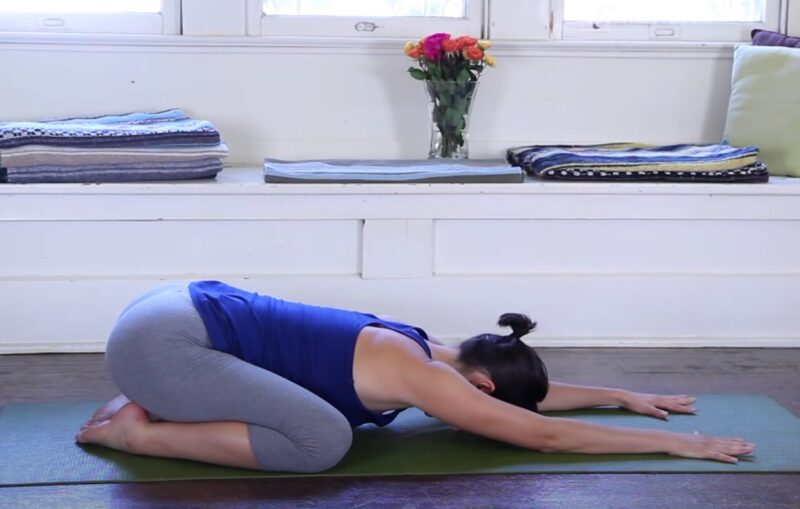
The child’s pose stretches your back, hips, thighs, and ankles, providing a moment of rest and reflection in your routine. This pose offers a sanctuary of calm, allowing for deep stretches and a moment to focus on your breathing, relieving stress from your spine.
Allow yourself to fully relax in the pose, feeling the floor support your body. Use this moment to focus on the progress you’re making toward spinal health. Visualize tension releasing from your back with each breath.How to do it
- Kneel on the floor with your toes together and knees apart.
- Sit back on your heels and fold forward, extending your arms in front of you.
- Rest your forehead on the floor and hold the position, taking deep, steady breaths.
- Stay in the pose for a comfortable duration, focusing on relaxing your spine and hips.
5. Single knee to chest stretch
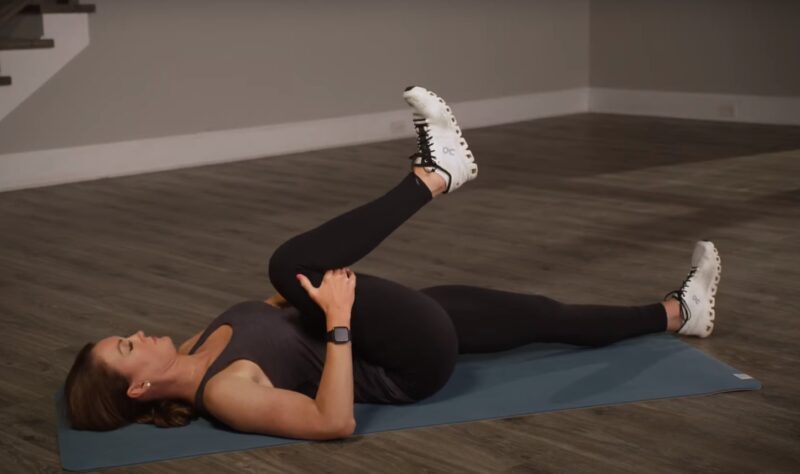
The single knee-to-chest stretch targets your lower back, relieving tension and promoting flexibility in the lumbar spine and hips. The movement isolates and addresses stiffness in the lower back, offering a controlled way to enhance mobility and relieve discomfort.
As you pull your knee closer, focus on the sensation of release in your lower back. It’s a nurturing movement, offering relief and a sense of care for your body.Instructions
- Lie on your back with both legs extended.
- Bend one knee and interlace your fingers just below the knee.
- Gently pull the knee towards your chest, keeping the opposite leg straight and relaxed.
- Hold the position for a few moments, then switch legs.
- Repeat several times, maintaining a focus on gentle stretching and relaxation.
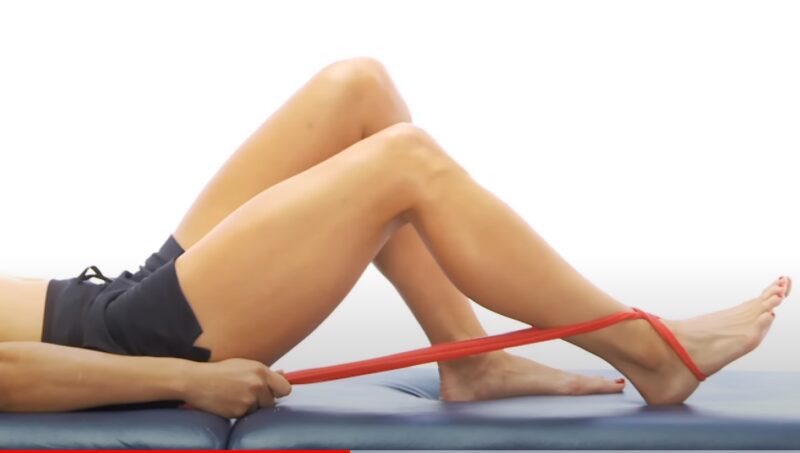
6. Hamstring stretch
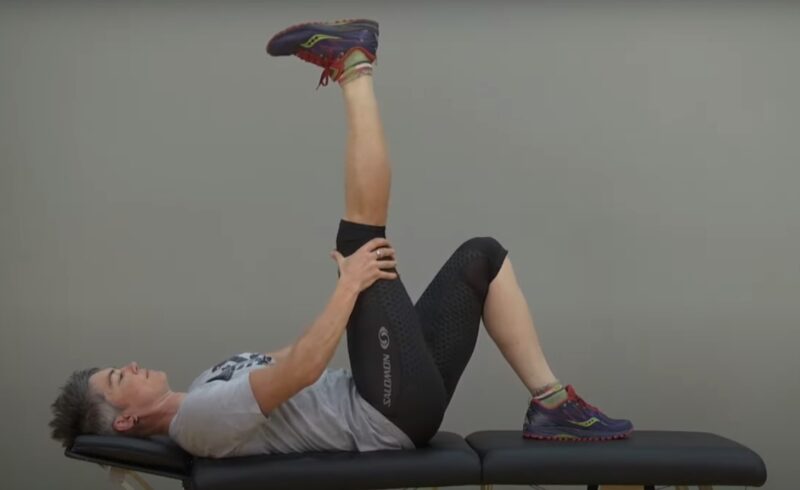
Stretching the hamstrings can indirectly relieve back tension, as tight hamstrings often contribute to lower back pain. This stretch is crucial for overall leg and back health, aiding in flexibility and reducing strain on the lumbar spine.
Imagine the tension in your hamstrings dissolving as you deepen the stretch. This creates more space for movement and flexibility, not just in your legs but also across your lower back.How to do it
- Lie on your back, one knee bent with the foot flat on the floor.
- Extend the other leg up, holding it with your hands on the calf or thigh.
- Gently pull the leg toward you, keeping your tailbone on the floor to maximize the stretch.
- Hold for a few moments, then switch legs.
- Perform the stretch several times, focusing on the release of tension in your hamstrings.
7. Downward-facing dog
A foundational pose in many yoga practices, Downward Facing Dog offers significant benefits for stretching the spine, hamstrings, and calves. It also aids in strengthening arms and shoulders.
Visualize pushing the floor away with your hands and feet, creating length in your spine. Allow the stretch to energize your body, imagining a flow of energy from your hands through your spine to your hips and down to your heels.Instructions
- Begin on your hands and knees, ensuring proper alignment.
- Press into your hands, lift your hips, and straighten your legs.
- Aim to lower your heels towards the floor, keeping a straight line from your wrists through your shoulders to your hips.
- Maintain the pose for several breaths, focusing on stretching your spine and legs.
- Return to your hands and knees before repeating the stretch.
8. Piriformis stretch

Targeting the piriformis muscle in the buttocks, which can contribute to sciatic pain when tight, the Piriformis Stretch is essential for relieving tension and improving mobility. The stretch not only targets the piriformis but also helps loosen the glutes and lower back.
Focus on the relief that comes with the stretch, adjusting the intensity to suit your comfort level. It’s a personal journey to flexibility and pain relief, so listen to your body’s signals and adjust as needed.How to do it
- Sit with legs extended forward.
- Cross one leg over the other, placing the foot flat on the floor.
- Pull the knee of the crossed leg towards the opposite shoulder.
- Hold the stretch for a comfortable duration, then switch legs.
- Repeat to promote flexibility and reduce tension in the piriformis muscle.
9. Cobra pose
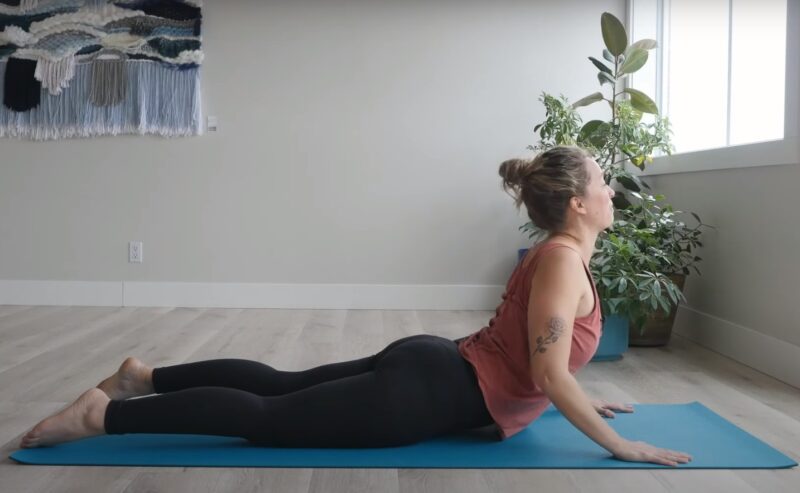
Cobra Pose is a gentle backbend that strengthens the spine, and opens the chest, shoulders, and abdomen, contributing to improved posture and flexibility. The focus should be on a smooth, controlled lift that engages the muscles in your back without straining.
Imagine your body as a cobra rising, with the lift coming from the strength in your spine. Allow the pose to open your chest and shoulders, breathing deeply to enhance the stretch and relaxation.Instructions
- Start by lying face down, hands placed under shoulders.
- Press into your palms and lift your chest, keeping your elbows close.
- Extend your spine, opening up the chest.
- Hold for a few breaths, then gently lower back down.
- Repeat, focusing on a controlled lift and the engagement of your back muscles.
10. Fish pose
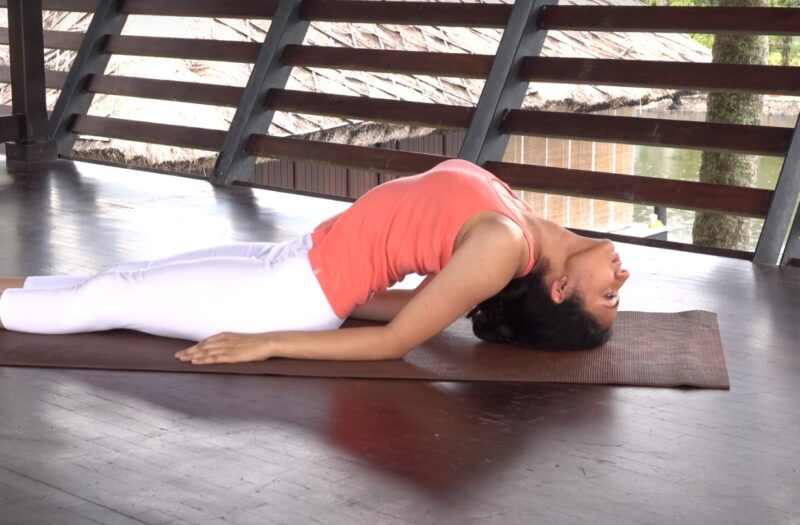
Fish Pose extends the front of the body, particularly the chest, throat, and abdomen. It’s an excellent counteraction to the forward bends and slouching that often characterize daily life. This posture opens up the chest and stretches the deep hip flexors and the muscles of the abdomen, encouraging a deep stretch across the chest and the throat.
Consider the sensation of opening as not just a physical act but a symbolic gesture of opening your heart and embracing vulnerability. Adjust the intensity to find that sweet spot where the stretch feels challenging yet not overwhelming.How to do it
- Sit with your legs extended and your hands under your hips.
- Lean back onto forearms and elbows, then arch your back.
- Tilt your head back, finding support on the crown or back of your head.
- Hold the position, breathing deeply to enhance the stretch.
- Carefully release and return to a seated position.
11. Camel pose
Camel Pose challenges your flexibility and strengthens the back muscles, offering an intense stretch for the entire front of the body. This pose stretches the front of your body, from your throat down through your chest and abdomen to your hip flexors.
Engage in Camel Pose with an awareness of your body’s limits. It’s a powerful stretch that offers room for growth in flexibility and back strength. Use your breath to guide the depth of the stretch, inhaling to lift and expand, exhaling to ease into the depth of the pose.Instructions
- Kneel, placing your hands on your lower back.
- Push your hips forward, arching back towards your heels.
- Reach for your heels with your hands, if achievable.
- Keep your chest lifted and shoulders back, breathing deeply.
- To exit, bring your hands back to your lower back and slowly come up to kneeling.
12. Straight leg raises
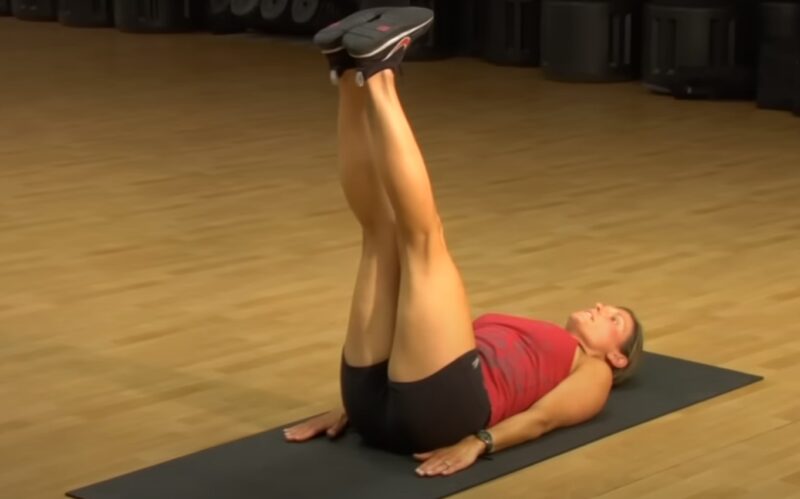
Straight leg raises are a straightforward yet effective exercise for strengthening the lower abdomen and stabilizing the spine. By engaging the core muscles, this exercise also indirectly supports spinal health. The focus is on engaging the abdominal muscles to perform the lift, ensuring the back remains pressed against the floor to avoid strain.
With each lift, visualize strengthening not just the muscles of your leg but the entire chain of support that keeps your spine aligned and healthy. Adjust the height of the raise to match your level of comfort and control, ensuring the exercise remains beneficial and free from discomfort.How to do it
- Begin by lying on your back, one knee bent, the other leg straight.
- Press your lower back into the floor to engage your core.
- Slowly raise the straight leg to the height of the bent knee.
- Lower the leg back down with control, keeping the movement smooth and focused.
- Repeat for several repetitions before switching legs.
- Focus on the quality of movement, ensuring your abdominal muscles do the work, and keeping the spine stable and supported throughout the exercise.
All in all…
I hope you enjoyed that back stretch routine! How’s your spine feeling now – a little less tight, yeah? The key is keeping these moves in your regular rotation. Our backs are always working hard for us, so giving them daily TLC is important.
Even just 5 minutes of stretches can make a big difference. Consistency is what really pays off when it comes to flexibility and relief. Before you know it, you’ll feel way more nimble and comfortable.